So a few months ago I uploaded a video on

how to stencil without paint bleed and in it I mentioned stenciling with spray paint. Maria asked if I would do a video on how to stencil with spray paint.
Of course I will!
I’m always happy to hear what viewers and readers want to see. If I can, I will be happy to create a new video to show my processes. Unfortunately for Maria right after she asked we had high winds for weeks and then it snowed in the middle of October. My window for spraying outside had closed. Then in November there was one Goldie Locks day where it was warm enough to paint outside and the wind was still.
At last!
Why Stencil with Spray Paint
So why would you want to spray paint stencils? Well, if you’re trying to produce a large number of signs in a short amount of time like I do it’s a great way to do sign fast. It’s also easier than traditional stenciling.
In my no paint bleed stencil method then you know the trick is to paint the base coat over the stencil before stenciling to fill the gaps. With spray paint you don’t need to use the base coat.
I Recommend Self Adhesive Stencils you can find them on Amazon and Etsy Or if you own a Cricut machine you can cut your own using vinyl. Either way the self adhesive stencils will make this task easier and cleaner. Because stencil spray adhesive is notorious for leaving residue behind. For a few dollars save yourself some aggravation.
How to Spray a Stencil
First pick your project. For me it’s a quick little sign on a Dollar Tree wood cuts they are a fun inexpensive way to create some custom signs.

Apply your stencil and mask off anything you don’t want to get paint on, because when you spray paint it will get everywhere so make sure it’s covered. You want to make sure you press down all around the stencil and ensure you have glued in place.

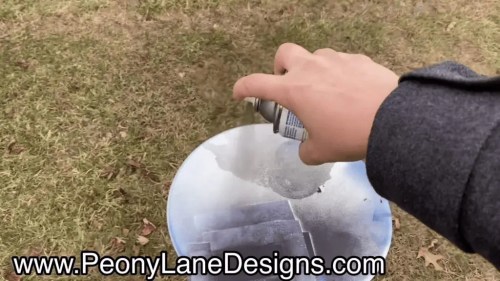
Hold the spray paint 2 to 3 feet above your project.

Then release a light mist of paint.

Let the paint fall in a light coat over the stencil. Do not saturate your stencil! That’s how you get paint bleed. Wait a few minutes between coats. Add as many light mist coats as you need to cover the whole stencil.

When the paint has dried to the touch but not completely dry it’s time to peel the stencil off!

Ta dah! You are now a spray paint stencil pro! I told you it was easy.

Now if you’re like me and have to spray paint outside you will have to wait for a near windless day. Otherwise the wind will carry all the paint away when you’re spraying from such a distance. The trick to the whole thing is to let the paint fall on the stencil and not saturate the stencil. If you keep that in mind while working you should have no troubles.
You can watch the full video below and see the process from start to finish.
Don’t forget to sign up for my email list so you don’t miss any of my easy DIY tips!
Enter your email address and you’ll receive an amazing series of tips and tricks, plus one amazing bonus. Every week you’ll receive emails packed with great tips to help you make your home gorgeous on a budget! You can DIY (if I can do it anyone can)!
Many blessings to you all!
~S
Links in post are affiliate.


